|
Cropping an image selects a rectangular portion of the image to print. You can crop an image using either the mouse or Origin and Size values.
 To Crop an Image Using the Mouse: To Crop an Image Using the Mouse:
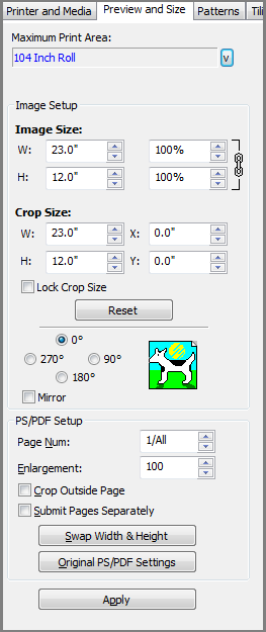
- Click on the [Preview and Size] tab.
- Place the mouse cursor on the edge of the image. The cursor changes into a line with two opposing arrows. Click and drag the dotted line to where you want the image cropped.
- Drag each side of the dotted line box until the dotted line box defines the area you want to print. You can also click inside the box and move the location of the box itself.
- Click [Apply] button.
 To Crop an Image Using Controls: To Crop an Image Using Controls:
- Click the [Preview and Size] tab.
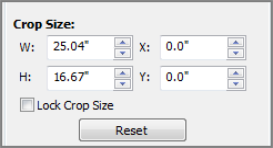
- In the [Crop Size] area, change values of [Width] and [Height] or [X] and [Y] axis using up-down arrow or type each value you want.
- Width - [Width] crops your image based on the width.
- Height - [Height] crops your image based on the height.
- X - [X] axis moves the location of the crop area on the image.
- Y - [Y] axis moves the location of the crop area on the image.
NOTE: If you want to lock above values, check [Lock Crop Size] box.
Related Topics
|

Figure 1

Figure 2
|


 To Crop an Image Using the Mouse: